8d030d326b9ea248d398b57c132efea8699fad22
Building a Personal Website
Part II: Nginx Web Server
This is the second entry in a series of posts on how to build your own website from the ground up. I thought it would be good to divide the posts to keep it from being overwhelming. In this part of the guide, we WILL be terminal heavy. But there is no need to worry as use commands and their accompanying screenshots to explain what is happening in every step.
* NOTE: I made a javascript copy function so that you can click, go to your terminal window, and then right-click paste into the command line. All you have to do is click on the clipboard.
** NOTE: When you copy the text to your terminal or command prompt remember to always replace the text in CAPTIAL LETTERS with your information.
Step #1: Login to your Virtual Machine Via Terminal
We went over how to do this in part I, but let's go over it again to make this guide a smooth experience.
It's time to open up the command line. In Windows, this is "command prompt" and in Linux/MacOS it is the "terminal". Once you've opened a window we need to "SSH" into our virtual machine via our domain name. To do this we will need the username and password of our virtual machine, so go to https://dynamic.lunanode.com/panel/vms and click on your domain.

You should see a username and password in the list.
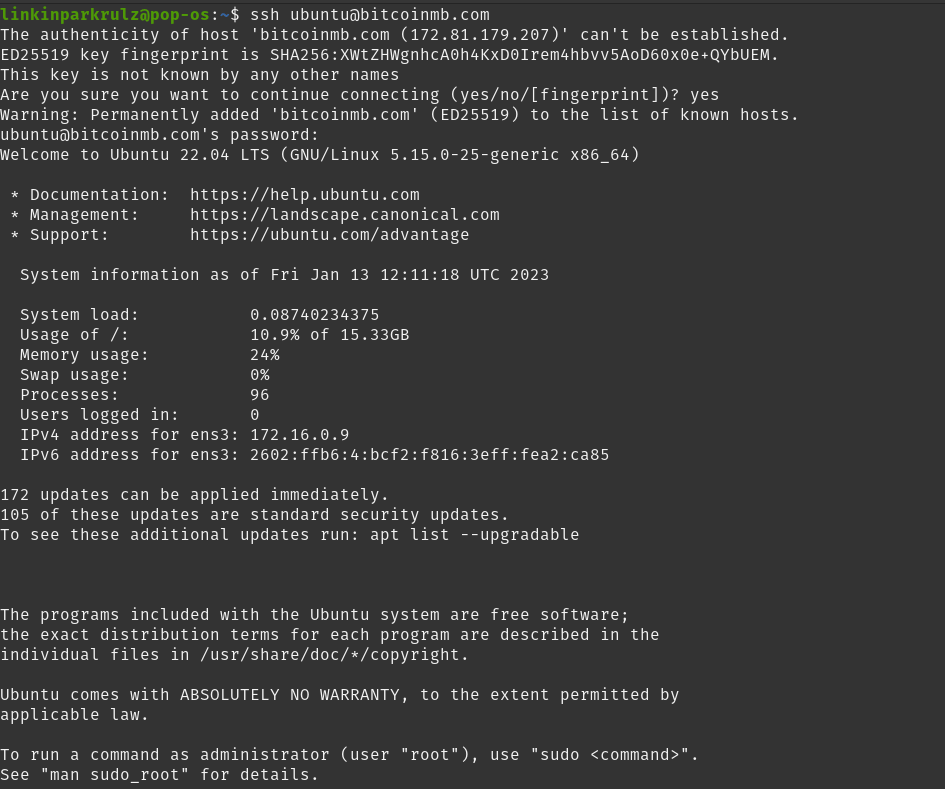
Now go back to the terminal and enter "ssh", then your username followed by "@" and then your domain name. After pressing enter you should be prompted for a password. Copy and paste your password from your Lunanode control panel. Press enter and you should be prompted
ssh USER@DOMAIN.TOPLEVELDOMAIN

Congratulations! You are now connected to your virtual machine via your local computer.
Step #2: Install Nginx
Nginx is a web server and reverse proxy server. It is known for its high performance, stability, and low resource consumption. Nginx is often used to handle heavy traffic sites, as it can handle a large number of simultaneous connections and has the ability to serve static files quickly. Let's install this powerful software on our virtual machine!
To do so, you will enter the command to refresh your repositories:
sudo apt-get update

Then you can enter the command to install nginx, type "y" and press Enter to continue:
sudo apt-get install nginx
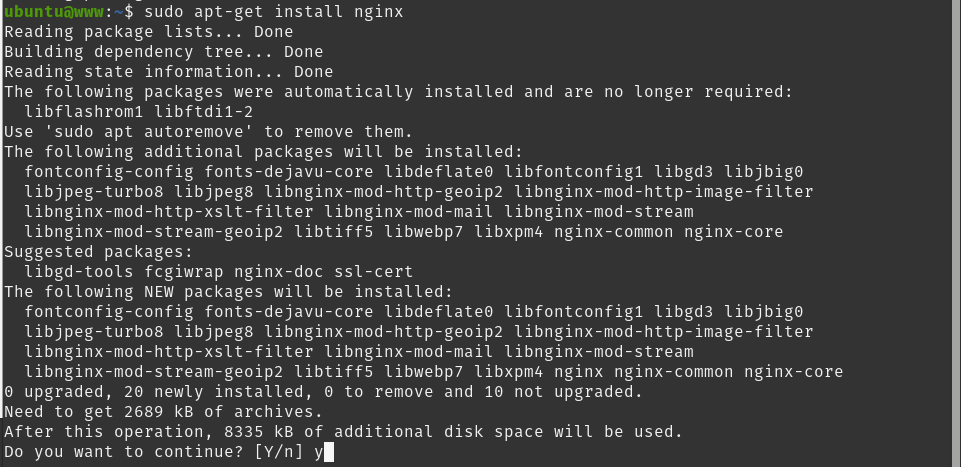
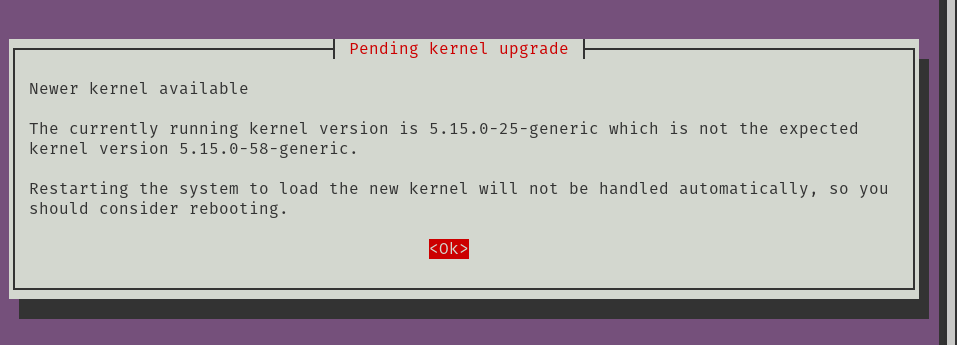
Once you press enter on the last command you will encounter a warning prompt. Hit Enter to continue.
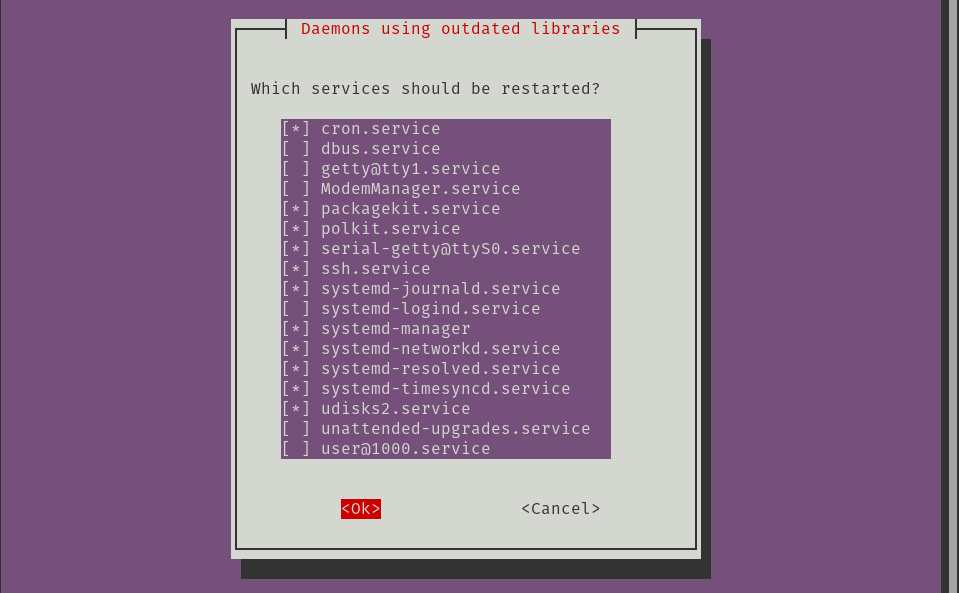
The next prompt will provide you with a list of things that will be restarted. Press Tab and then Enter to proceed.
Now that the restart is complete, we can move on to configuring our Nginx web server.

Step #3: Configure your Nginx web server
We need to configure Nginx to tell it where to find your web content, so it can serve it to clients.
First, we need to move to the proper directory:
cd /etc/nginx/sites-available
Now that we are in the "sites-available" directory we need to create a file that matches our domain. In the case of my example it will be "bitcoinmb.com" (domainname.tld). To make the folder for your domain the code is below, just make sure to use your domain.tld instead:
sudo nano DOMAIN.TOPLEVELDOMAIN

In our file we need to include several instructions for nginx. Copy this block of text into your new file:
            server {
          listen 80 default_server;
          listen [::]:80 default_server;
          root /var/www/DOMAIN.TOPLEVELDOMAIN;
          index index.html;
          server_name DOMAIN.TOPLEVELDOMAIN www.DOMAIN.TOPLEVELDOMAIN;
          location / {
            # Redirects to the version without .html
            if ($request_uri ~ ^/(.*)\.html$) {  return 302 /$1;  }

            # Tries the uri, .html file and the news prefix.
            try_files $uri $uri/ $uri.html news-$uri news-$uri/;
          }
        }
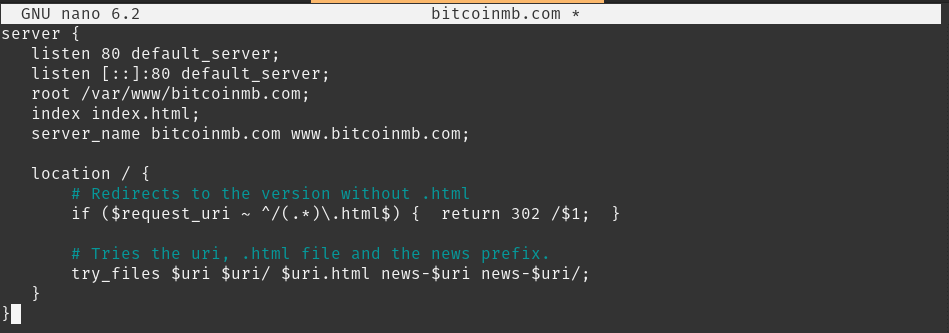
Make sure to change the bolded text in the code example above to your domain. Format the code to match example and then hit "CTRL+X", press "y" and then "Enter" to save file.
Great! Our configurations are available via our file in the "sites-available" folder and we need to enable it so it can be used. To do this, copy it over to the "sites-enabled" folder. Once again, remember to edit the capitalized text to match your domain.
sudo ln -s /etc/nginx/sites-available/DOMAIN.TOPLEVELDOMAIN /etc/nginx/sites-enabled/DOMAIN.TOPLEVELDOMAIN

Let's restart our nginx web server:
sudo systemctl restart nginx

Step #4: Add our HTTPS certificate
An HTTPS (Hypertext Transfer Protocol Secure) certificate is needed to establish a secure, encrypted connection between a web server and a web browser. This ensures that any data exchanged between the two, such as login credentials or credit card information, is protected against eavesdropping or tampering. Additionally, many web browsers will display a warning or error message if a website is accessed over an insecure connection, which can lead to a loss of trust and credibility for the website. So, let's add a certificate to our domain!
Start with entering these commands one at a time to install our firewall:
sudo apt update

sudo apt install ufw

Now we will add firewall rules ot allow traffic to certain ports
sudo ufw allow ssh

sudo ufw allow http

sudo ufw allow https

Make sure the firewall is now enabled, type "y" and press Enter to continue:
sudo ufw enable

And the last thing with the firewall is to do a status check:
sudo ufw status

It's time to install certbot, enter each of these commands one by one:
sudo apt update

sudo apt install snapd

sudo apt remove certbot
sudo snap install --classic certbot

sudo ln -s /snap/bin/certbot /usr/bin/certbot

Certificates tend to expire after a set amount time, so let's create a CRON job to auto-renew the certificate. A CRON job is a job that we schedule to execute at some time in the future (such as a renewal). Enter the command below and type "1" and hit Enter to edit with Nano:
sudo crontab -e

Let's add a line to our cron job file to facilitate auto-renewal of our certificates. Add this line into our list of cron jobs, then hit "CTRL+X", press "y" and then "Enter" to save file:
17 7 * * * certbot renew --post-hook "systemctl reload nginx"

The final thing we need to do before we add the certificates is double check if we have all of our "A" records in place on Lunanode, for our domain. Go to:
https://dynamic.lunanode.com/panel/dns

Click "Edit Records" to the right of your domain name. Under "name" you should have one that displays your domain name and points to your IP and you should also have one that says "www" and points to your IP.
If not, simply click "Add Record"

The type should be A, the name should be www and the data should be the IP address of your virtual machine. Then click "Add Record".

Alright then, let's add some certificates! This command is preferable because it automatically edits our file we made in the "sites-available" for us. Allowing us to receive secure connections on port 443 instead of 80:
sudo certbot --nginx

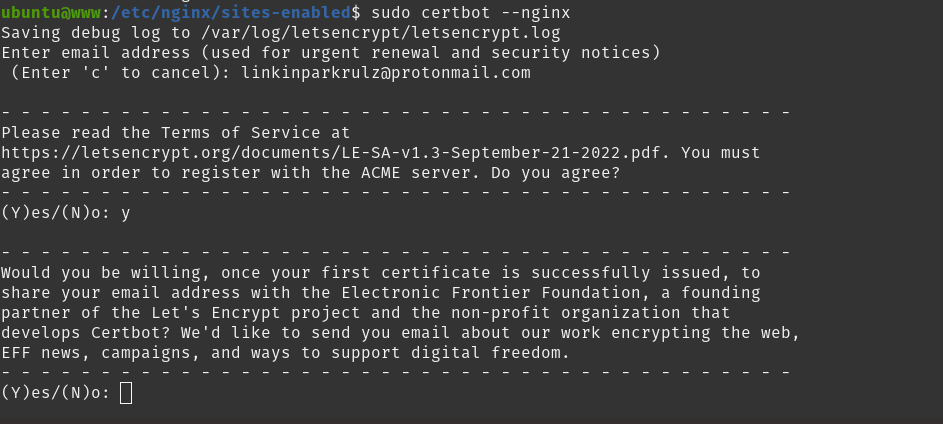
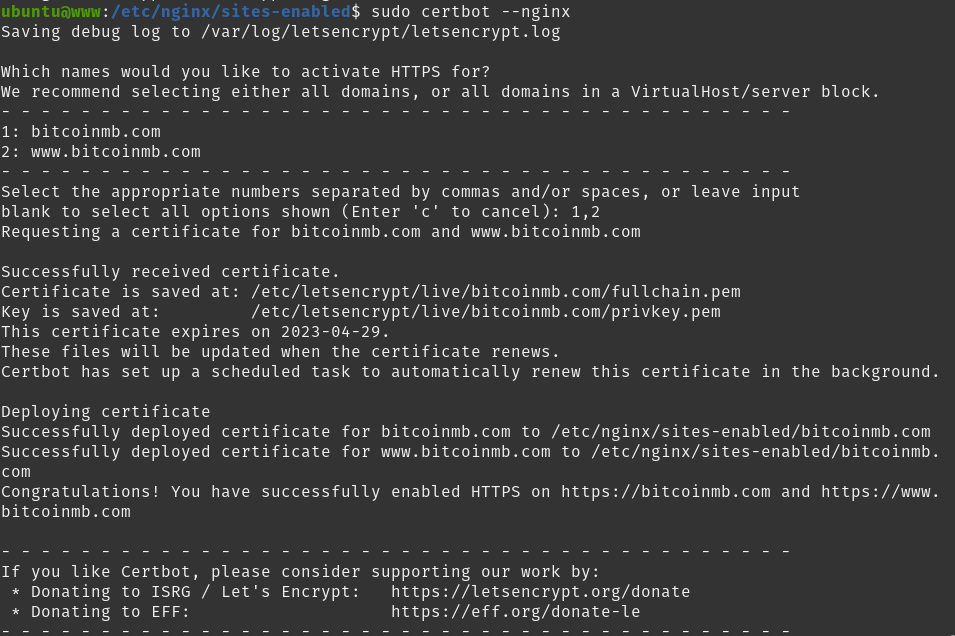
Hit Enter to continue.
After that you now have a SSL Certified website. Let's restart our web server and create our first web page.
sudo systemctl restart nginx

Step #5: Time to Display a Webpage
All of the behind the scenes scaffolding has been built to get us to this point; displaying a webpage! In this step, we will create a folder and transfer some files from our local machine to our virtual machine.
Let's create a directory where we will put our website files:
sudo mkdir /var/www/DOMAIN.TOPLEVELDOMAIN

Our website folder is created; however our permisssions on the folder are not substantial enough in order to send data from our local desktop.
First, we will change the permissions on the folder.
sudo chmod 775 /var/www/DOMAIN.TOPLEVELDOMAIN

Second, we will change the ownership of the folder to our user, which most likely is "ubuntu", so when you copy the code don't forget to change USER to "ubuntu" or whatever your username is.
sudo chown USER /var/www/DOMAIN.TOPLEVELDOMAIN

Now we create our local web page folder and main web page file "index.html".
Navigate to your Documents folder on your desktop and make a folder within it with the name of your domain "DOMAIN.TOPLEVELDOMAIN". Our folder is created.
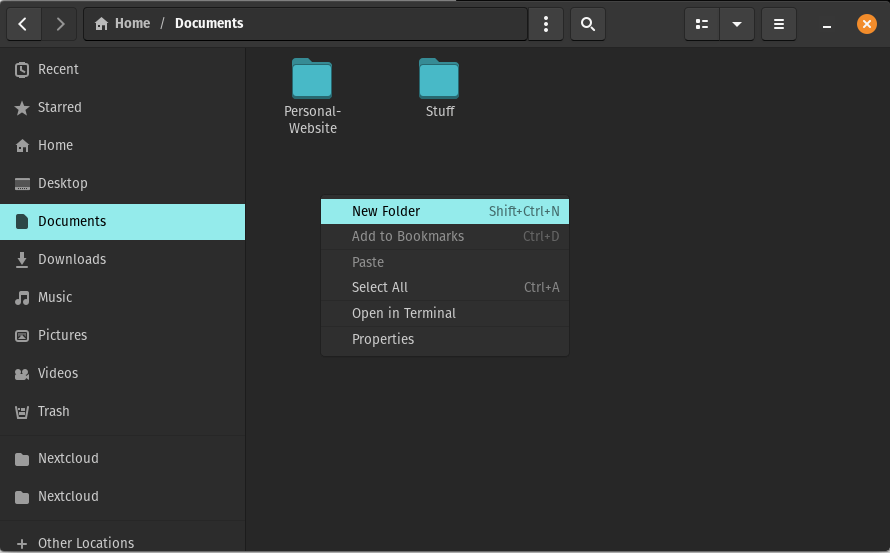

Let's make the file, open a text editor of your choice, usually Windows will have "Notepad" and Linux will have "Text Editor". Open up either program and type "Hello World" and save it as 'index.html' into your new folder.


Okay, now we will send our file to our webserver. Right-click on your new folder and if you're on Windows it will be "Open Command Window Here" and if you're on Linux it will be "Open in Terminal".
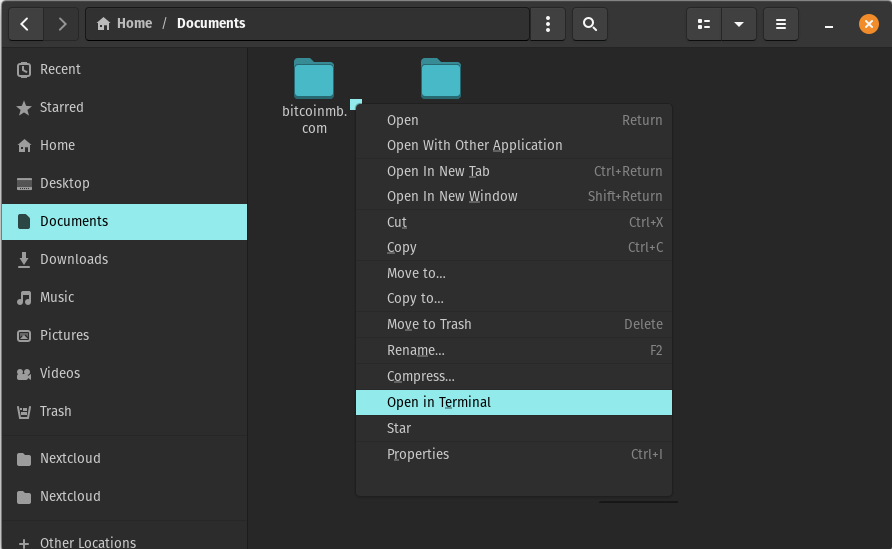
Now that the terminal is open let's enter this command:
scp -r * USER@DOMAIN.TOPLEVELDOMAIN:/var/www/DOMAIN.TOPLEVELDOMAIN

That command writes all of your local files in your folder to your virtual machine folder. You will be prompted for your password to complete the action.
And we are done! Let's enter our DOMAIN.TOPLEVELDOMAIN into our browser and see the results...

Congratulations! You have setup your web server using NGINX, configured your server, made a webpage, uploaded it to your virtual machine and displayed it to the internet. It's a lot of work, but hopefully you've understood a little bit of it and can replicate the steps to go further with your project now. In the next guide, we are going to have two paths, but each will lead to you having a more full fledged website.
Let's Customize Our Website!
Comments
Resources

Bitcoin for Small Business
An open source brochure to present to small businesses in your community.

Nostr Guide
Getting some keys, running a relay and NIP-05 verification


